How to sign Git commits with your GPG key
One of the primary uses of GPG today is to sign your code commits in your git repository.
Why do we want to do this? The main reason to sign your commits is to establish trust. For multi-person teams or projects, particularly with code repositories hosted in the public cloud, signing commits can ensure that others have confidence that the author truly made the changes they are seeing.
You can read a longer article on Github on all the other benefits of signing your code commits.
Now, let’s learn how to sign your Git commits with a GPG key.
Configuring Git with your GPG key
At this point, I assume that you have:
- Installed
gpgandgiton your computer already. You can check out my previous article about how to installgpgon Mac using Homebrew. - Created a GPG key, including a signing key.
Step 1: Get your key’s ID
To start, we need to get the GPG key ID that we want to sign the commits. You can do that by performing the following command:
gpg -K --keyid-format=longThe output will list all the GPG keys on your current keyring with a secret key. An example is as follows:
/Users/mikeross/.gnupg/pubring.kbx
-------------------------------
sec#  rsa4096/778856E1A65FFC55 2018-08-29 [SC] [expires: 2022-12-31]
83E281169F61178CC1A45E95778856E1A65FFC55
uid                 [ unknown] Mike Ross <[email protected]>
uid                 [ unknown] Mike Ross <[email protected]>
ssb   cv25519/C603EC88C9E12345 2022-01-23 [E] [expires: 2022-12-31]
ssb   ed25519/6EC83029C7254321 2022-01-23 [S] [expires: 2022-12-31]
You will want to grab the ID beside the rsa4096 (this might change depending on the encryption algorithm you chose when setting up your GPG key). In my case, this is the value 778856E1A65FFC55.
Step 2: Configure the git repository to know about the key
In the top-level of your code directory, assuming that it is already version controlled by Git, run the following command. Ensure that you replace the example ID with the one from your actual keyring in step 1.
git config user.signingkey 778856E1A65FFC55If you want to add the --global flag to make this apply to all your repositories, then go ahead!
Step 3: Configure your zsh shell profile to know your GPG installation location (Mac only)
If you installed GPG on Mac using Homebrew, we need to manually set an environment variable for GPG. If you haven’t already done it, so you need to run the following command:
if [ -r ~/.zshrc ]; then echo 'export GPG_TTY=$(tty)' >> ~/.zshrc; \
else echo 'export GPG_TTY=$(tty)' >> ~/.zprofile; fi
We’re so close but not quite there yet! If you tried to sign and commit to your repository, you would still likely end up with an error like the following.
error: gpg failed to sign the data
fatal: failed to write commit object
Mac requires an additional program to do password entry for your GPG key for reasons unknown to me. Back to Homebrew to install it:
brew install pinentry-mac
echo "pinentry-program $(which pinentry-mac)" >> ~/.gnupg/gpg-agent.conf
killall gpg-agent
Step 4: Sign your commits
Now you should be set to sign commits to your Git repository. Just add the -S flag when doing your standard git commit via the command line.
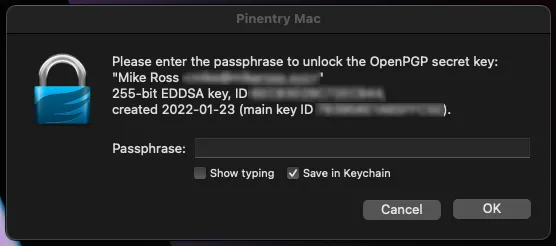
git commit -S -m "My commit message."You are prompted to type in your password for your GPG, and then voila! You should have successfully signed your commit!

Note: You can save your password to your user account keychain so you need to type it only the first time!
Step 5: (Optional) Auto-sign all commits
If you use an IDE or don’t use your command line as frequently, you can tell Git to auto-sign all your commits with a simple change to your git repo configuration.
git config commit.gpgsign trueStep 6: Add your GPG public key to your team’s repository
It’s great that you sign your commits now, but we want to make it easy for our team to see that they are signed. Depending on your project’s repository host, you can configure it as follows:
- Github: https://docs.github.com/en/authentication/managing-commit-signature-verification/adding-a-new-gpg-key-to-your-github-account
- Gitlab: https://docs.gitlab.com/ee/user/project/repository/gpg_signed_commits/#add-a-gpg-key-to-your-account
- Bitbucket: https://confluence.atlassian.com/bitbucketserver/using-gpg-keys-913477014.html#UsingGPGkeys-add
When configured correctly, you can see that the commits are verified (signed) in your repository.
